No Knead Bread

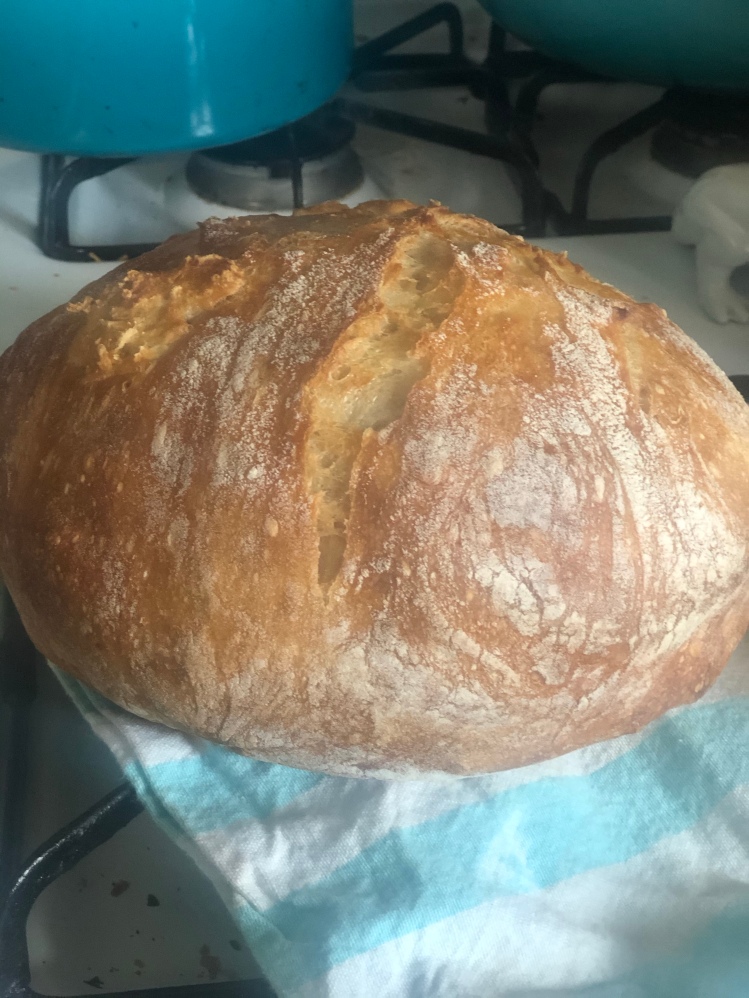
This bread, y’all. Aka “that good bread” according to Jack. And it. Is. GOOD. Crispy crust, chewy inside, and stupid easy. The only downside is that it takes a while to proof so you can’t have it IMMEDIATELY. I’ve made a loaf a day for the past… 5 days? 😬 We’re obsessed. Perfect with soup, dipped in olive oil with some Italian seasoning, slathered with butter fresh out of the oven…. just try it, okay??

Ingredients:

  • 3 cups all purpose flour
  • 1 1/4 tsps salt
  • 1/4 tsp yeast

Directions:

  1. Combine ingredients in a large bowl, then mix with 1 5/8 cups of water.
  2. Cover it with plastic wrap and let it sit for 12-18 hours (the longer the better), keeping it relatively warm- about 70 degrees. If your house is cold (like mine can be) you might put it somewhere it’ll get warmth from sunlight or near a heat source. It’s ready when little bubbles pop up on the surface, like this.
  3. Next, lightly flour a work space. I find my silicone mats work well for this. Turn the dough onto the surface and fold it just a couple of times, then cover it with plastic wrap and let it sit for about 15 minutes.
  4. Now flour your hands and work surface just enough that the dough won’t stick. Generously flour a cotton dish towel. 
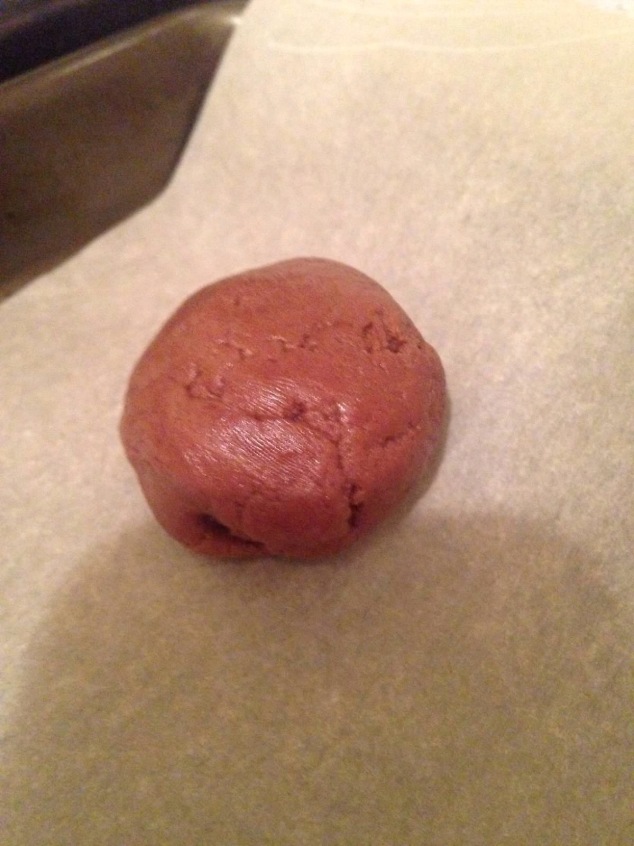
Work dough into a rough ball shape, then place seam side down onto the towel. Lightly flour the top of the ball, then cover with another cotton towel. Let sit for 2 hours. You’ll know it’s ready if you poke it, and the indent stays. Pitting edema, if you will. (Occupational humor.)
  5. About 30 minutes before the dough is ready, preheat your oven to 450 degrees Fahrenheit. The original recipe says to put your pot in the oven as it heats, but I’ve not found this step necessary. I also don’t have a Dutch oven, but my 6 qt stockpot has worked just fine. Slide your hand under the bottom towel and flip dough into the pot. Shake it a little so it distributes a little more evenly but no worries- it’ll fill out as it bakes.
  6. Cover with a lid and bake for 30 minutes. Look at it. JUST LOOK AT IT.
  7. Remove lid and bake for another 10-15 minutes until it’s an even nicer golden brown.
  8. Try not to devour in an instant. We’ve tried, and failed miserably.

Wasn’t that easy?! I’ve been intimidated by bread for so long but this recipe is so simple and the results are consistently delicious. Big thanks to The New York Times for this classic!

Big A$$ Bakery Style Muffins

I don’t know what it is, but my breakfast kryptonite appears to be chocolate chip muffins. Put one in front of me and I. Will. DEVOUR IT. My son seems to have inherited my affinity for them. “Jack, buddy, what do you want for breakfast?” “Uuuuuum, chawcwat chip muffins? *devilish grin on adorable stinker toddler face*” Okaaaay, okay. πŸ˜‰ He gets to help mix these up too, so it’s a fun kitchen exercise for us both.  

 That being said, you could totally mix other things into this muffin base. But really, chocolate chip is the way to go here!

Ingredients:

  • 3 cups flour
  • 4 tsps baking powder
  • 1/2 tsp salt
  • 1/2 tsp ground cinnamon
  • 1/8 tsp ground nutmeg
  • 2 eggs, room temperature preferred
  • 1 cup sugar
  • 1 cup milk
  • 1/2 cup canola oil (or vegetable oil/melted coconut oil)
  • 1 tsp vanilla extract
  • 1 and 1/2 cups  semi-sweet chocolate chips (or chocolate chunks; or dark chocolate; or milk chocolate- you get the picture.)

Directions: 

Preheat oven to 425 degrees Fahrenheit and prepare a jumbo muffin tin, either with liners or coating lightly with cooking spray. In a large bowl, whisk together your flour, baking powder, salt, cinnamon, and nutmeg. Set aside. In a medium bowl/large measuring cup, whisk together your eggs and sugar until combined. Mix in milk, oil, and vanilla.  


Fold the wet ingredients into the dry, mixing just until combined. The batter is going to be suuuuuper thick and slightly lumpy- this is good!  

 
Now fold in your chocolate chips, giving the batter just a few good turns.  

 
Divide the batter into your muffin tin, filling almost to the top. I get exactly 6 big ass muffins out of this recipe!  

 
Then pop ’em in the oven at 425 for 5 minutes, then drop the temperature to 375. Bake for an additional 20-25 minutes depending on your oven… Just give it the toothpick taste and watch for lightly golden tops, like this!  

 
Allow to cool in the tin for about 10 minutes before enjoying. One of these with a big glass of cold milk (or coffee if you’re like me!) is a wonderful treat for breakfast and destined to be repeated many times, at least in our house. πŸ˜€ Enjoy! 

Recipe slightly adapted from Sally’s Baking Addiction

Crockpot Chicken Taco Chili

How have I never shared this recipe until now? Since I found this on Pinterest years ago, this chili has been in heavy rotation at our house during chilly weather. First of all, it’s STUPID easy. Dump everything in the crockpot when you get up in the morning and you’re set. Second, it’s actually somewhat healthy- it’s originally a Weight Watchers recipe. Last, and most important- it’s incredibly tasty.  Put this on your menu to make on your busiest day this week! 

Ingredients:

  • 2 boneless, skinless chicken breasts (I always use frozen.. Even easier, right?! Simply subtract from your cooking time if using fresh/thawed.)
  • 1 small onion, diced
  • 2 cans diced tomatoes with green chilis, drained 
  • 1 can yellow corn, drained 
  • 1 can kidney beans, rinsed and drained
  • 1 can black beans, rinsed and drained
  • 1 (8 oz) can tomato sauce 
  • 1 packet taco seasoning
  • 1 tbsp cumin
  • 1 tbsp chili powder
  • Garnishes (sour cream, shredded cheese, cilantro, crackers, etc) optional 

Directions:

Line crockpot with disposable liner if using (seriously, those things are life changing). Add all of your ingredients to the crockpot.  

 Give it all a good stir, then set to low for 8-10 hours or high for 4-5 hours. Just before serving, shred the chicken breasts and stir until evenly mixed into chili.

 
Ladle into bowls and garnish as you please.  

 
Boom! So easy it’s almost embarrassing. Hope you enjoy as much as we do! 

Recipe from Skinnytaste.

Sun-dried Tomato, Kale, & Chicken Sausage Quinoa Bake

Ok guys, I don’t think it’s a secret… I love quinoa. And I love chicken sausage. While the combination of flavors in this dish aren’t necessarily something I’d salivate over, I found it intriguing enough to give it a try. And then I made it again a couple of days later! This bake is super flavorful but is also really light, so you don’t feel disgusting after a big ol bowl of it. Mark’s not a huge fan of kale, so next time I think I’ll try spinach in it’s place. I froze several batches for work lunches and it holds up beautifully. Plus it’s pretty healthy, so if you’re looking for a quick weeknight dinner or something you can make ahead and still feel good about eating, give this a try!

Ingredients:

  • 1 cup quinoa, uncooked
  • 2 cups chicken broth
  • Β½ cup sun-dried tomatoes, julienne cut
  • 1 tbsp olive oil (I used the olive oil from the sun-dried tomato jar)
  • 2 stalks of kale, chopped into bite-sized pieces
  • 5 chicken sausages, fully cooked and sliced into coins (try Trader Joe’s fontina, spinach and garlic variety… Yum!)
  • 2 shallots, diced
  • salt and pepper to taste
  • 1 tsp garlic salt
  • Sprinkle of Italian cheese (optional)
Directions:
Preheat oven to 350 degrees Fahrenheit. In a 9×13 baking dish, add the quinoa and chicken broth, spreading evenly along the bottom.  


Spread the chopped kale over the top of the quinoa/broth mixture.  


Next, spread the sun-dried tomatoes and sprinkle the shallots on top of the kale. Drizzle on the olive oil.  


Season with some salt, pepper, and the garlic salt. Finally, layer the chicken sausage and top with sprinkling of cheese, if using.  


Pop the whole blessed pan into the oven for an hour, or until the quinoa is cooked.  


I failed to get a photo of my bowl because it was devoured by so quickly! Hope you enjoy and thanks for stopping by. πŸ˜‹πŸ΄

Recipe adapted slightly from Fit Foodie Finds.

Texas Sheet Cake Cookies

Guys, fair warning- these may be the simplest cookies ever. So stinkin easy, and I’d be willing to bet you have everything in your pantry to make them RIGHT NOW. They’re so easy, I made them twice in one week after my mother-in-law posted the recipe. My husband greatly appreciated this as Texas sheet cake is his all-time favorite. πŸ˜‰ The cookies are soft, almost brownie-like in texture; the icing literally melts in your mouth. Just chocolatey enough without being overwhelming. You’ve been warned. 

Ingredients:

For the cookies:

  • 1 stick unsalted butter, room temperature
  • 1/3 cup sugar
  • 1 egg
  • 1 tsp vanilla
  • 1 tsp baking powder
  • 1/2 tsp salt
  • 1 and 1/3 cup flour
  • 1/2 cup semi-sweet chocolate chips, melted

For the icing:

  • 1 stick unsalted butter
  • 2 tbsps cocoa powder
  • 3 tbsps milk
  • 2 and 1/2 cups powdered sugar

Directions:

Preheat your oven to 350 degrees Fahrenheit and line a couple of baking sheets with parchment paper (you’ll end up with about 2 dozen cookies). In a small bowl, whisk together the flour, baking powder, and salt; set aside. In the bowl of your stand mixer, beat together the butter and sugar until light and fluffy, about a minute or two. Add the egg and vanilla. Add dry ingredients and mix until just combined. Put chocolate chips in a small, microwaveable bowl and microwave in 30 second intervals until completely melted. Add melted chocolate to the stand mixer bowl and blend well.  


I think the dough ends up looking like chocolate ice cream! πŸ˜‹


Use a measuring tablespoon to scoop dough and roll into small balls. These don’t puff up too much so don’t worry about putting them too close together!  


Bake for about 7 minutes, then transfer to a cooling rack. They make still look shiny and not baked through- this is ok! You don’t want to over-bake them and the baking sheet will finish them nicely while they’re cooling.  


While your cookies are cooling, whip up the icing. In a small saucepan, combine the butter, cocoa powder, and milk.  


Mix together on medium heat until butter is completely melted. Remove from heat and whisk in the powdered sugar.  


Use a spoon to drizzle icing generously on top of the the cookies…  


Then attempt to wait a while for the icing to completely set before eating. I don’t think we’ve made it more than 15 minutes without taste testing and they’re fine… Just a bit messy. 😊  


Stupid easy, amirite? Enjoy with a cold glass of milk or a cup of coffee, or standing over your kitchen sink before your toddler comes in demanding a cookie for himself… What? 😜 

Recipe adapted slightly from Kylee’s Kitchen.

*I apologize for the abysmal quality of the photos. It was dark, rainy, and generally gross when I made these!

Chicken Tortilla Casserole Skillet

Remember that one time when I told you I love an easy, fast, flavorful dinner? Aka most recipes I’ve shared with you? 😜 This one is no exception. Minimal prep work, and about 30 minutes til you’ve got dinner on the table. For some reason we always forget about this skillet until I flip through my recipe book, and then go “MAN we should make this more often!” once we’ve eaten. Adjust the seasonings to make it as spicy or mild as you like and serve with a frosty margarita for a fun Mexican night at home!

 Ingredients: 

  • 1 boneless, skinless chicken breast, diced
  • 1 tbsp vegetable oil
  • 2 garlic cloves, minced
  • 1 tsp cayenne powder
  • 1 1/2 cups chicken broth 
  • 1 can black beans, rinsed and drained
  • 1 can sweet corn
  • 1/4 tsp salt
  • 2 cups broken tortilla chips
  • 1/2 cup salsa 
  • 1/4 cup cheddar Jack cheese

Directions:

First, take your chips…

IMG_3014.JPG

And smash them to bits. Great exercise for getting rid of frustrations. πŸ˜‰

IMG_3015-1.JPG
 

Next, season your chicken with salt and pepper. Heat a teaspoon of the oil in a medium, oven safe skillet over medium-high heat. Cook the chicken til golden brown, then remove from skillet and set aside.

Add the remaining 2 teaspoons of oil to the skillet. Toss in your garlic, cayenne, and salt, cooking until fragrant.  Add the broth and scrape up the browned bits, then bring to a simmer.

IMG_3016-0.JPG

IMG_3017.JPG

Stir in about half the broken chips…

IMG_3018.JPG

And add the salsa, beans, corn, and cheese. 

IMG_3019.JPG

Nestle the chicken pieces back into the broth and cook over medium low heat until cooked through.

IMG_3020.JPG

Top with the remaining chips and sprinkle with some more cheese.

IMG_3021.JPG

Stick under your broiler for a couple of minutes until golden brown, bubbly, and awesome.

IMG_3022.JPG

Dig in! Splendid with a margarita on the rocks. πŸ˜„

IMG_3024.JPG

Recipe adapted from Branny Boils Over.

Crockpot Beer Chicken

Guys, this is hands down the easiest Crockpot recipe you’ll ever make. 7 ingredients, most of which are spices, and I’ll put good money on you having all of them in your kitchen right now. You can even through the chicken in frozen, so it’s a perfect choice if you’re strapped for dinner ideas and need something to throw together quickly. In my experience making this meal, using a lighter beer produces a juicier, more flavorful chicken than a darker beer. And as for the spices? Again- these are the ones I used, but use whatever you have on hand and it should turn out pretty well. 😊

Ingredients:
4-6 boneless, skinless chicken breasts (or less if you don’t want leftovers)
1 can/bottle of beer
1/2 tsp black pepper
1/2 tsp salt
1/2 tsp paprika
1/2 tsp powdered garlic
1/2 tsp dried oregano

Directions:
Arrange the chicken breasts along the bottom of the Crockpot. Add spices.
IMG_3626
Pour beer over the top of the chicken and spices, and stir if you wish. Cook on high for 4-5 hours or low for 8-10 hours, turning at least once during cooking time.
Remove chicken from liquid, plate, and serve with sides of your choice.

IMG_3641
Recipe from Pinterest.

Herbed Pork Tenderloin

This is one of those dinners that, plated right, can look super fancy with minimal effort. Plus pork tenderloin is pretty lean, so you don’t have to feel guilty about devouring it. The herbs de Provence lend just enough savory flavor without being overwhelming. Put this on the menu for your next dinner party!

Ingredients:
1 pork tenderloin
3-4 tbsps herbs de Provence
Salt
Pepper

Directions:
Preheat oven to 425 degrees Fahrenheit and line a baking dish or sheet with foil. Lay pork tenderloin out in foil and season with salt and pepper.
IMG_2760.JPG

Then take your herbs de Provence and rub aaaaall over your tenderloin. Mmmm mmmm good!
IMG_2762.JPG

Bake for about 18-20, or until a meat thermometer inserted into the center reads 160 degrees Fahrenheit. Let rest for 10 minutes before slicing and serving.
IMG_2763.JPG

The easiest, prettiest pork dinner you ever did see!
IMG_2764.JPG

Recipe from Pioneer Woman.

Chocolate Chip Scones

IMG_1897.JPG
Have you guys noticed I have a *slight* thing for chocolate? While these breakfast treats can be (and I have) made with a slew of other mix ins, chocolate chips are by far my favorite. Another thing I love about these scones is that you can whip up a batch in no time. Freeze them individually and bango, scones for breakfast any ol’ time you want! Yet another dangerous recipe, as the ingredients are mostly pantry staples and take no time at all to prepare. Read at your own risk!

Ingredients:
1Β½ cups plus 2 tbsp flour
ΒΌ cup sugar
2 tsp baking powder
Pinch of salt
1 cup chocolate chips
1 cup heavy cream
2 tbsp butter, melted
Additional sugar for sprinkling

Directions:
Preheat oven to 375 degrees Fahrenheit and line a baking sheet with parchment. In a medium sized bowl whisk together the flour, sugar, baking powder, and salt. Add chocolate chips and toss in til chips are lightly coated.
IMG_1890.JPG

Now mix in the heavy cream until combined and a dough forms.
IMG_1891.JPG

Give the dough a few good kneads with your clean, well floured hands.
IMG_1892.JPG

Use a dough scoop or rounded tablespoon to drop rounds of dough onto prepared baking sheet. (If you’re freezing them, pop them in the freezer to firm up at this point, then individually wrap in plastic wrap.) Brush tops with melted butter and sprinkle a tiny pinch of sugar on top.
IMG_1895.JPG

Bake for 15-20 minutes, or until tops are lightly browned. Put on a pot of coffee and enjoy your delightful breakfast! πŸ˜„ Happy eating!
IMG_1896.JPG

Recipe from Annie’s Eats

Easy Cocoa Brownies

I apologize in advance to those of you trying to be mindful of your diets, eating better, etc… Because I guarantee you have every ingredient needed to make these brownies. Dangerously easy, slightly reminiscent of a boxed brownie mix- but better, obviously, because they’re homemade. I like to throw in chocolate chips if I’m feeling especially indulgent (which is always, of course) to add a little texture. I guess you could add nuts, but why would you ruin a perfectly good brownie with that? 😜 One of my earliest, fondest memories of my dad is making brownies just like this. To truly invoke that boxed brownie mix of my childhood, I have to use a wooden spoon to mix. I recommend you do the same πŸ˜‰ Enjoy!

Ingredients:
10 tablespoons unsalted butter
1 1/4 cups sugar
3/4 cup plus 2 tbsps unsweetened cocoa powder
1/4 teaspoon salt
1/2 teaspoon pure vanilla extract
2 large eggs, cold
1/2 cup all-purpose flour
1/4 cup semi-sweet chocolate chips

Directions:
Preheat oven to 325 degrees Fahrenheit and line and 8×8 pan with foil or parchment paper. Add butter, sugar, cocoa powder, and salt to a medium microwaveable bowl.
IMG_1910.JPG

Heat in 30 second increments, stirring between intervals, until butter is melted. The mixture will be fairly grainy at this point; that’s okay!
IMG_1911.JPG

Next, add your vanilla. Add eggs one at a time, stirring vigorously after each addition. You should have thick, shiny batter at this point.
IMG_1913.JPG

Once your mixture is nice and glossy, toss in your flour. Mix until you can no longer see the flour, then beat it until you feel like your arms might fall off (a feeling I distinctly remember as a youngin).
IMG_1914.JPG

Stir in your chocolate chips….
IMG_1915.JPG

Pour your chocolate lusciousness in your pan, spreading evenly…
IMG_1916.JPG

And pop it in the oven for 30-35 minutes, or until a toothpick inserted comes out clean. Get ready to feel like a kid again!
IMG_1917.JPG

Recipe from Smitten Kitchen